Postman
Postman is a popular API client for RESTful APIs, it provides an easy to use sleek user interface to interact with any endpoints without having to get too technical. In this tutorial, we'll run through a few basic commands against the PathLit endpoints. For consistency's sake, we'll do the same exact scenario we did in the cli tutorial - Postman is free for a basic use.
Pre-Requisite#
Pathlit#
A PathLit account with an API Key (or token). Don't have one yet? get it here. The API key is a string looking like
56IvxxxxxxxxxxxxxxxxxxxxxxxxxxxxxxxxxzLSPathLit base url:
https://engine.pathlit.io/v1/Two methods to call: we'll use
timeseries/infosandoptimiser/weights
Postman#
- Postman installed on your machine (they ship a version for MacOS, Windows x32 . x64, Linux) - how do I do this?
The folks at Postman did a very nice video explaining how to install, setup and use their tool, you can find it in their learning page or directly watch it on their youtube channel
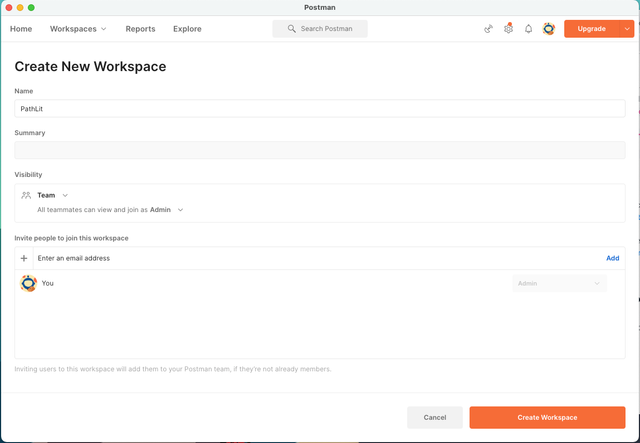
We suggest to create a new workspace, in this tutorial we'll name it PathLit but it can be anything.
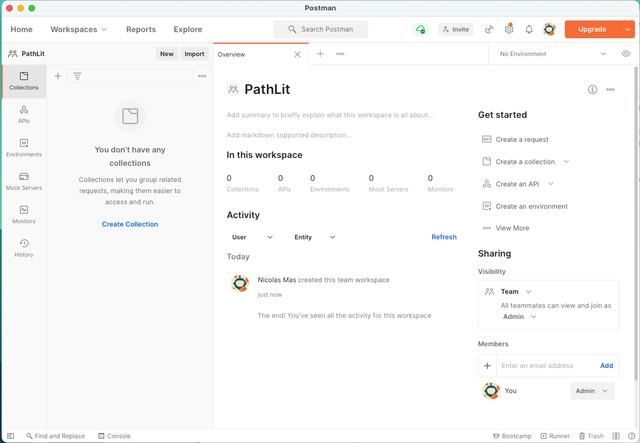
This should get us to the default workspace home. Our next action is to add a collection under our workspace by either using the link create collection or with the '+' symbol next to the collection tab:
Our new collection has a few tabs, let's look at the one titled authorization: this is where we are going to put the PathLit API key (or token) which was created at the same time as your PathLit account ( don't have one yet? create it here ). This is an important step, don't skip it!
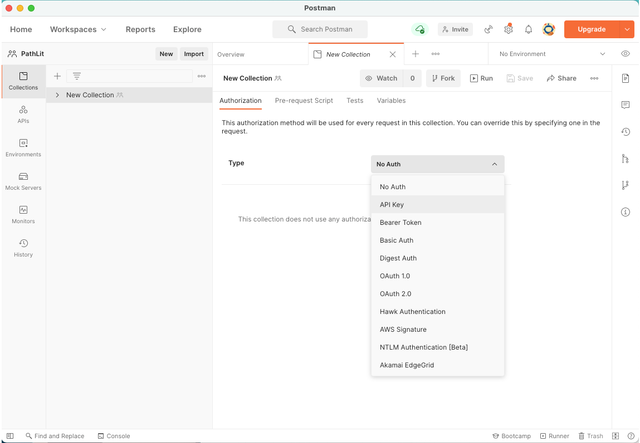
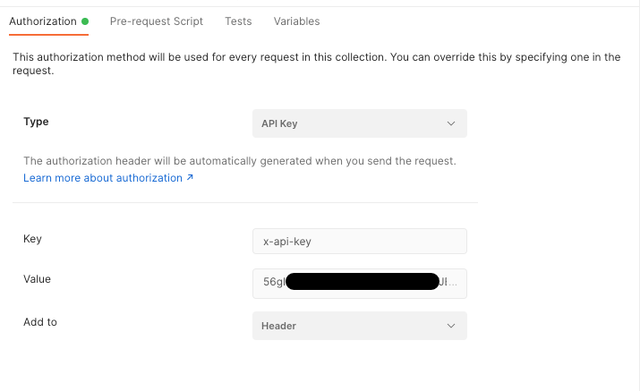
For the type please choose: API Key, then for the Key field please put x-api-key and for the Value field, please put your Pathlit API Key (or token). Please make sure that thewe Add to property is set to Header. Make sure you hit the Save icon.
warning
If you don't use the x-api-key value, the PathLit API will respond with a 403 Forbidden error code.
We are all set and ready to create our endpoints, within our newly created and configured collection in our workspace.
Reading from the API [aka GET]#
Create a new request#
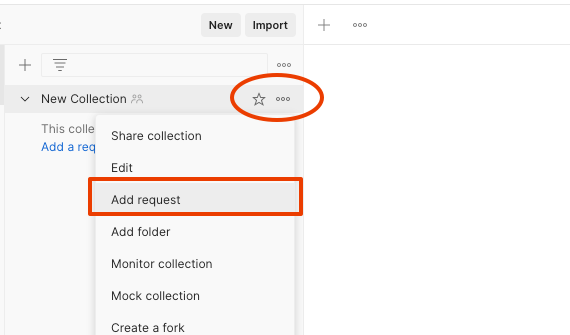
First, let's create a new request. It can be done by clicking on the ... symbol next to the Collections tab. Add a request.
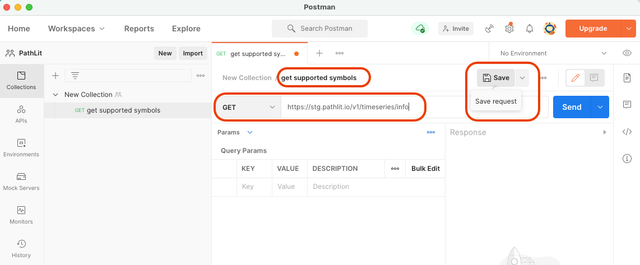
This will prompt to a new screen. Please give a name to the request - here we put get supported symbols. Please note the dropdown control under the New Collection field, it should be set to GET. Inform the URL to the endpoint - https://engine.pathlit.io/v1/timeseries/info ( more information on this specific endpoint in the documentation ). Don't forget to save.
Send the request#
We are ready to send our request. The Send button does the job. This endpoint is quite fast so the response should come instantaneously.
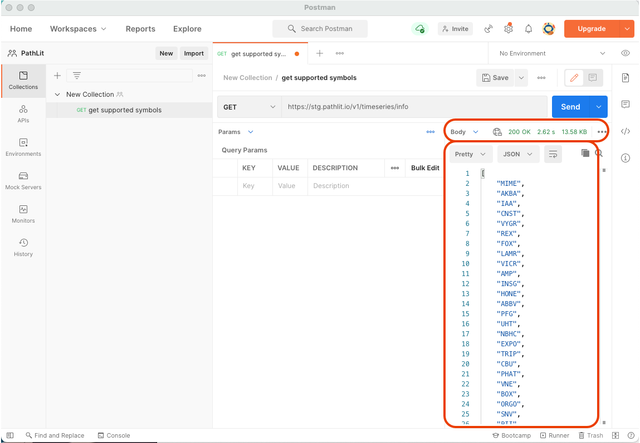
The response body is json formatted and should be displayed in a user friendly format.
Going a bit further#
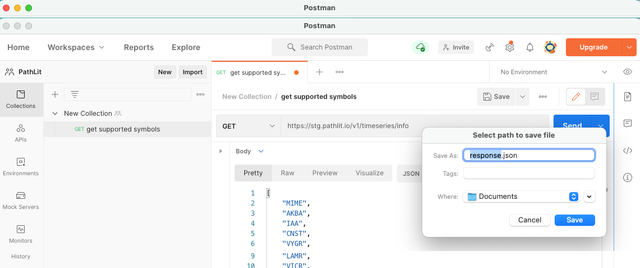
- The response can be easily saved as a file:
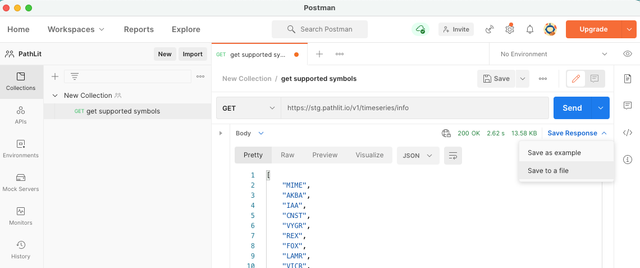
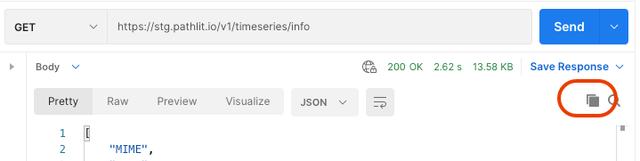
- Or the response can be saved in the clipboard :
- Finally, Postman provides code snippet for various programming languages. This can be very helpful if you want to do some quick prototyping on top of the PathLit API.
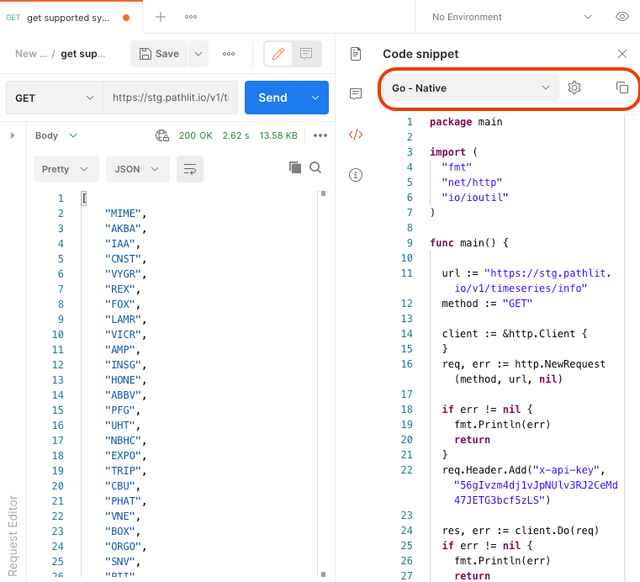
Many languages are supported: see the dropdown (C#, Java, C, Javascript, PHP, Ruby, Python etc.)
Sending computation to the API [aka POST]#
Let's send three instruments to the weights endpoint. We will received a json formatted response with all the possible strategies for this specific bucket (more on the weights endpoint).
Create a new request#
We are interacting with a new endpoint, so we need to create a new request. But this time, instead of a GET request we will use a POST request. The URL of the endpoint is https://engine.pathlit.io/v1/optimiser/weights (more on the weights endpoint).
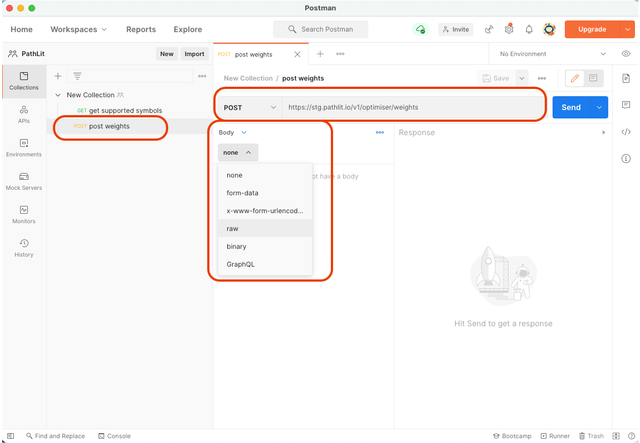
A few things are happening here. We need to change the type of request from GET to POST, with the dropdown next to the url https://engine.pathlit.io/v1/optimiser/weights. Once done, we save the request. Please take a look at the parameters dropdown, we are going to modify it in the next step (body).
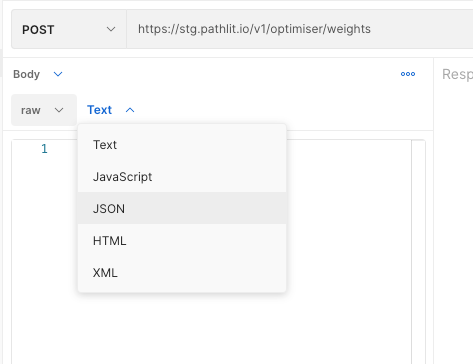
Here we need to select raw and Text should be changed for JSON. Then we put the following content:
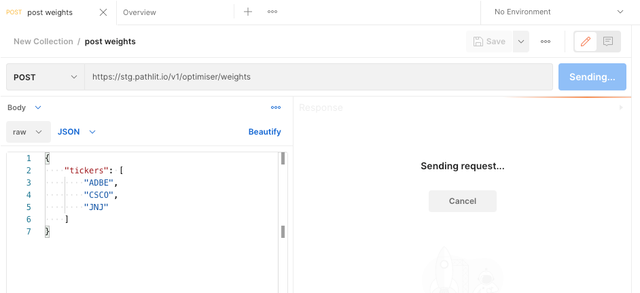
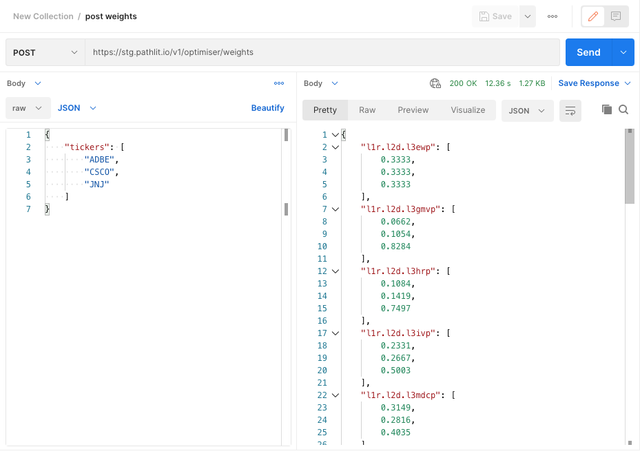
{ "tickers": ["ADBE", "CSCO", "JNJ"]}
Here we are sending a request for three symbols, adding more is trivial. For instance, adding Amazon in the list:
{ "tickers": ["ADBE", "CSCO", "JNJ", "AMZN"]}Send the request#
We send the request by clicking the send button. It will take a little of time for the PathLit API to compute the weights, but ultimately, it will send a response.
The response is received by postman, the result is display as a JSON message.
Going a bit further#
The principles that are valid for a GET are valid for a POST.